
Cannabis Drying Chart: How to Use It for Perfectly Dried Buds
A clear, accurate Cannabis Drying Chart is one of the most useful tools for growers who want smooth, flavorful, and potent buds. By understanding how temperature, humidity, and time interact during the drying phase, you can avoid harsh smoke, mold, and terpene loss while preserving the quality of your harvest.
What Is a Cannabis Drying Chart and Why It Matters
A cannabis drying chart is a simple visual or tabular guide that shows the recommended ranges for:
- Temperature in the drying room
- Relative humidity (RH) around your buds
- Airflow and ventilation guidelines
- Typical drying time from harvest to cure
Using these ranges helps you dry buds slowly and evenly. Drying too fast leads to crispy outsides with wet cores, harsh smoke, and weak aroma. Drying too slow increases the risk of mold and degraded cannabinoids.
Key Parameters in a Cannabis Drying Chart
Ideal Temperature Range
The most common temperature range on a cannabis drying chart is:
- 60 to 70 F (15 to 21 C) for most home grows
- 62 to 65 F (17 to 18 C) for very terpene-conscious drying
Cooler temperatures slow evaporation, allowing chlorophyll to break down more completely, which improves flavor and smoothness. Avoid temperatures above 75 F (24 C), which can drive off volatile terpenes and make buds smell grassy or hay-like.
Ideal Humidity Range
Relative humidity is just as important as temperature. A typical cannabis drying chart suggests:
- Day 1 to 3: 55 to 60 percent RH
- Day 4 to 7: 50 to 55 percent RH
- Late dry (if needed): 45 to 50 percent RH
These values create a slow, controlled dry. If humidity is too low (under 40 percent), buds dry too quickly and lock moisture inside. If humidity is too high (above 65 percent), you risk mold, especially in dense flowers.
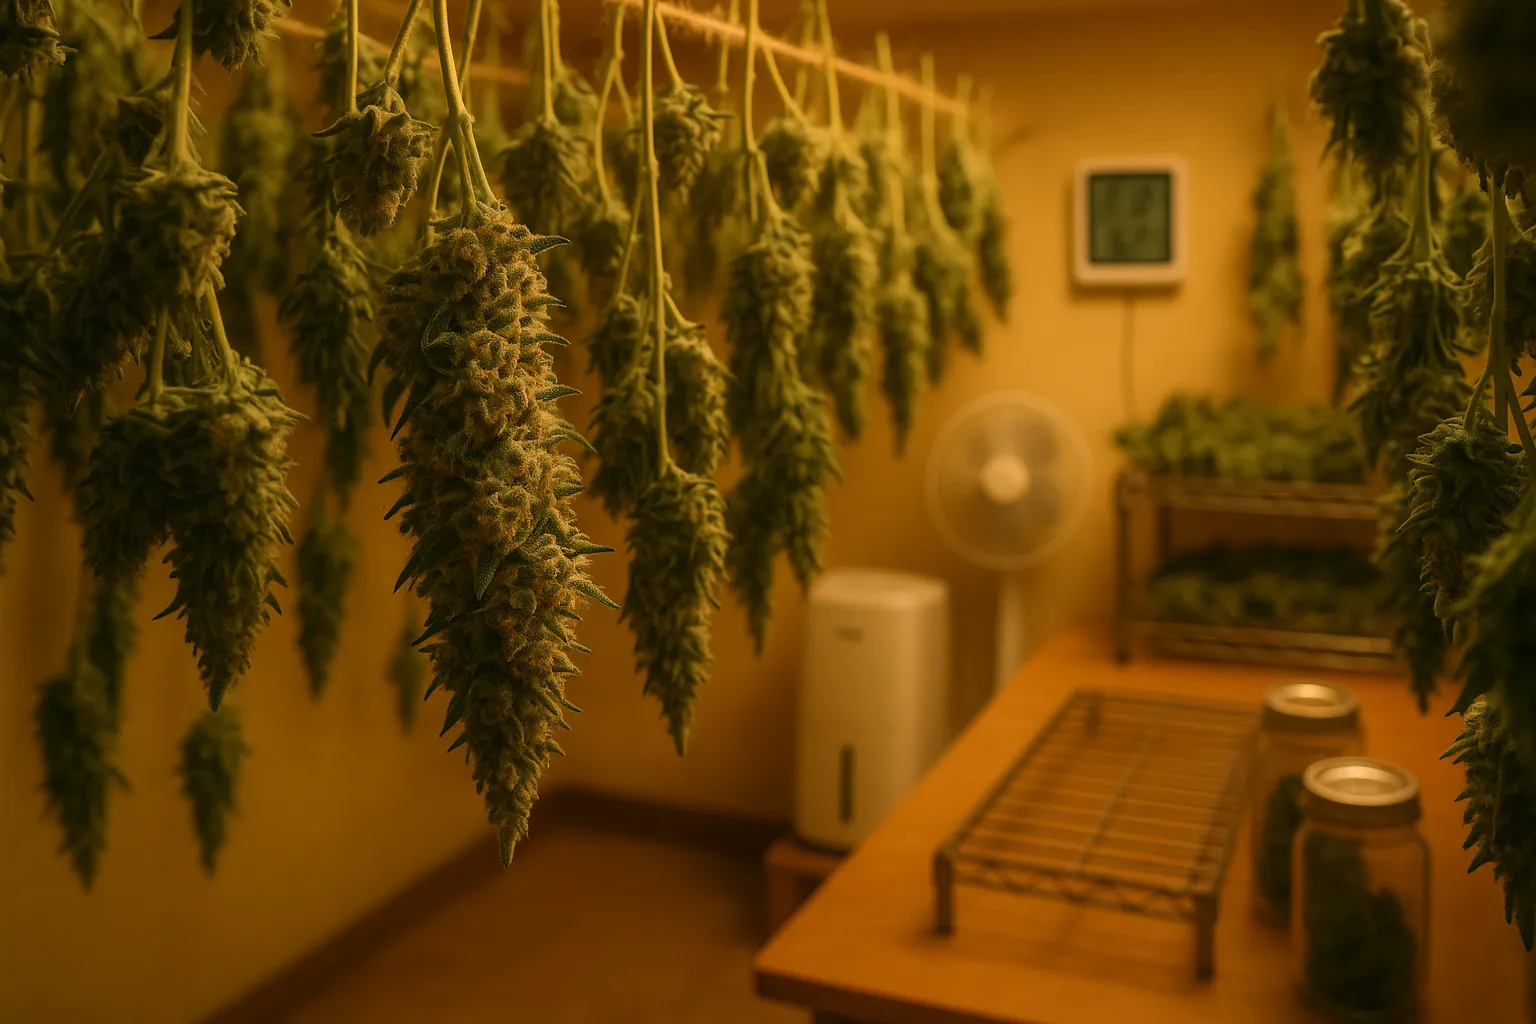
Airflow and Ventilation
A good cannabis drying chart also mentions airflow:
- Gentle, indirect air movement around the room, not blowing directly on buds
- Exhaust fan or periodic venting to refresh the air and manage humidity
Too much direct airflow can overdry and cause uneven moisture content. Too little airflow can create stagnant pockets where mold thrives.
Sample Cannabis Drying Chart for Home Growers
Use this simple chart as a starting point and adjust based on your environment and bud density.
Drying Chart Overview
- Day 1 to 2
- Temperature: 65 to 70 F (18 to 21 C)
- Humidity: 55 to 60 percent RH
- Goal: Start slow drying, remove surface moisture
- Day 3 to 5
- Temperature: 62 to 68 F (17 to 20 C)
- Humidity: 50 to 55 percent RH
- Goal: Steady moisture loss, prevent case-hardening
- Day 6 to 9
- Temperature: 60 to 65 F (15 to 18 C)
- Humidity: 45 to 50 percent RH
- Goal: Finish drying, prepare for curing jars
Most growers aim for a 7 to 10 day drying window. Very dense or large colas may need a little longer, while small, airy buds may be ready sooner.
How to Use a Cannabis Drying Chart in Practice
Step 1: Harvest and Prep
Before you hang your plants, decide on your trimming style:
- Whole plant hang: Slower dry, good for low-humidity climates.
- Branch hang: Balanced option for most growers.
- Wet trim on racks: Faster dry, suited to very humid regions with strong climate control.
Step 2: Control Temperature and Humidity
Use basic environmental tools to stay within your cannabis drying chart ranges:
- Hygrometer and thermometer to monitor the room
- Dehumidifier if RH is consistently high
- Humidifier or open water trays if RH is too low
- Oscillating fans for gentle air movement
Step 3: Check Bud Dryness
Instead of relying only on days, use physical signs:
- Small stems snap instead of bend
- Bud outsides feel dry but not brittle
- When squeezed, buds spring back slightly rather than crumble
At this point, you are ready to move from drying to curing jars.
From Drying to Curing: Finishing the Process
Even the best cannabis drying chart is only half the story. Proper curing stabilizes moisture and enhances flavor and potency.
- Jar buds when they feel dry outside but still have a little sponginess.
- Keep curing jars at 58 to 62 percent RH using small humidity packs if desired.
- Burp jars daily for the first week, then less often for 2 to 4 more weeks.
Combined with a controlled dry, curing transforms raw flowers into smooth, aromatic, and potent cannabis.
Conclusion
A well-designed Cannabis Drying Chart gives you a clear target for temperature, humidity, and time, turning guesswork into a repeatable process. By keeping your dry slow, cool, and controlled, then following with a careful cure, you protect terpenes, preserve cannabinoids, and produce buds that burn clean and taste their best, harvest after harvest.
